A favorite of English teachers and user researchers! Annotations are a simple yet powerful way to help you think about what's happening on the page (or in our case the video) that's in front of you. Today we are delighted to announce a new look for the annotation system, which will make your team's collaboration a much more visual and efficient process on our platform.
Annotations have always been a great way to identify and keep track of everything from bugs to level completion. They give your team a fast way to see and share their findings and allow you to refer back to entire projects without rewatching the videos. Now we've put the ability to customize how these annotations look into your capable hands.
What's changed?
For new customers our annotations categories are set up as such:
- General (with a blue dot)
- Positive (with a check-mark symbol)
- Negative (with an X symbol)
- Game Progress (with a trophy symbol)
- Bug (with a bug symbol)
For existing customers we’ve left everything as it was. However you or anyone in your team can add, delete or change the wording of each annotation category.
Fear not, if somebody accidentally deletes a category you currently have annotations in, that category will still show up in the videos.
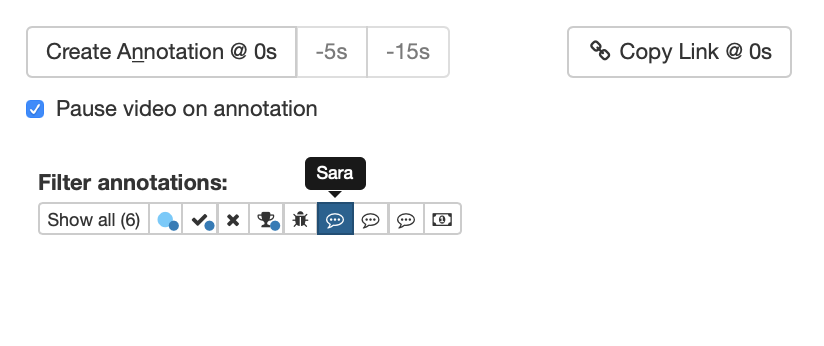
Filters?
In the video player you can also filter by the different annotation types. You can even filter for more than one type! This is great when different members of your team are looking through the videos. For example developers may only be interested in scanning for bugs, while the marketing department may want to see when players complete a level or when the in-game ads are triggered.
That being said, annotations are much more than just a method of highlighting events in a video. They are a dynamic way of showing your thought process as you watch it.
A use case you could set up is to give everyone annotating the videos their own category, and then have them annotate the videos with only their category filtered. At the end you would be able to see unbiased differing opinions of the same video. You could set that up by adding new categories for each researcher (in this case Sara, Josie and David) on your PlaytestCloud settings page. Then before they start annotating a video all they have to do is filter by their category. When they hit the create annotation button the annotation will then automatically be in their category.

This feature also allows your user research teams to use their preferred coding system to categorize their notes. All of these annotations and their timestamps also appear in the annotation downloads available for your playtests.
Want to learn more?
As always if you have any questions feel free to reach out to us here!